Getting Started
Installation instructions
Download the software
To download the software, login to our client area and then do the following:
- Click on “My products” link in the user navigation bar.
- Click on one of your software licenses to view its details.
- Click on the “Downloads” tab at the top of the page.
- Click on the “Download” link in the “Software” section to download the software.
- Once you downloaded it, extract it’s contents to your computer.
All plugins and templates are already bundled into the software package so you don’t need to download them separately.
Upload files
Using an FTP program such as Filezilla, CuteFTP, etc. upload all extracted files to your server.
Image files and font files should be uploaded in BINARY format. All other files should be uploaded in ASCII format (also known as “text” format). Most modern FTP programs will do this for you automatically so you won’t have to worry much about it.
Run installation wizard
Point your browser to the “install” directory where your software files were uploaded (e.g. “https://www.example.com/install”).
Follow installation wizard steps to install the software.
Done
Congratulations! Software has been installed successfully. You may now start using it.
Free installation
If at any point you encounter any issues or need assistance, feel free to contact us. We offer free professional installation to help you get started.
Removing index.php from the address bar
During installation software will attempt to check if your server supports URL structure without index.php For example instead of using https://www.example.com/index.php/users system will use https://www.example.com/users If it wasn’t able to do so for you automatically and you still see index.php in your address bar when you navigate to different pages of your site, try navigating to https://www.example.com/users and see if it works. If it does, you may edit “application/config.php” file and remove index.php from there. Make sure to delete all cache files in the “application/cache” folder after that so that software could update its settings.
Update instructions
Create a backup
Before updating your site, we highly recommend creating a backup of your database. If something goes wrong, you can always restore your original site. Most hosting companies have necessary backup tools in the hosting control panel. If you’re not sure where to look or how to create a backup, you may contact your hosting provider for assistance.
Download the files
To update your site you must download the latest version of the software and update wizard. To download the files, login to our client area and then do the following:
- Click on “My products” link in the user navigation bar.
- Click on one of your software licenses to view its details.
- Click on the “download” link next to the software and then the update wizard.
- Once you downloaded it, extract their contents to your computer.
Please note that you must download both – the latest version of the software and update wizard.
If you download only the update wizard, you will not have the new files needed to run your site correctly. If new versions of the plugins you use are available, you must download them too. If you use a non-default template for your site, you may need to contact your template designer for an update as well.
Upload files
Using an FTP program such as Filezilla, CuteFTP, etc. upload all extracted files to your server in the same folder where you have your site files. You will need to overwrite existing files if asked.
Image files and font files should be uploaded in BINARY format. All other files should be uploaded in ASCII format (also known as “text” format). Most modern FTP programs will do this for you automatically so you won’t have to worry much about it.
Create a blank folder name ‘cache’ inside the application folder.
Run the update wizard
Point your browser to the “update” directory where your software files were uploaded (e.g. “https://www.example.com/update”).
Follow update wizard steps to update the software.
Done
Congratulations! Update has been successfully installed. You may now delete the “update” folder.
First steps
Accessing control panel
To access your control panel, go to your site and login using your email address and password. In the user navigation bar locate a link called “control panel” and click on it.
You may also login to your control panel directly by going to https://www.example.com/index.php/cp If during installation you’ve edited your configuration file not to use index.php, you may instead go to https://www.example.com/cp
Navigating control panel
Software plugins, features and settings are combined into several tabs in the top navigation bar of the control panel. You may hover over them to view available options.
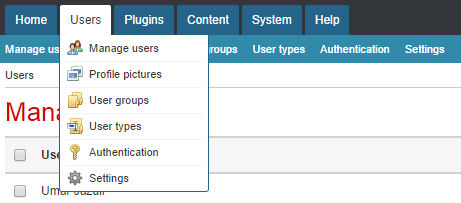
Once you click on the desired option you will see a second row of links related to the option you chose. For example if we select “configuration” in the “system” tab, we will see “configuration”, “email templates”, “meta tags”, etc.

From now on if you see references such as “system – email templates”, “plugins – blogs”, etc, it means you need to first select the tab and then look for the link in the second row of the navigation bar.
Installing plugins
Once you’re in the control panel navigate to “system – plugins” (hint: hover over the “system” tab and click on “plugins”) to view available plugins. To install plugins, simply click on “install” link next to the plugin of your choice.
Setting your site title
Navigate to “system – configuration” page and change the “site title” text box. This title will appear in the header of your public pages.
To change the title of your site on the homepage, navigate to “system – configuration – meta tags” and click on the “system” plugin. This page allows you to fill in meta tags for your site’s homepage.
Email settings
Navigate to “system – configuration” and click on the “emails” tab. Fill in your name and email address in the “from name” and “from email address” text boxes. Whenever users receive emails from your site, they will see that name as the sender and will be able to reply to the email address you specified.
Changing site logo
Navigate to “system – presentation – templates” and click on “settings” link next to the template you use on your site. You will be able to add your own logo image and change other various template related settings. Note that different templates may have different settings available.
Automation
Software may be configured to automatically send email notifications (such as membership expiration, account activation reminders, etc) and perform various automated tasks to ensure optimal performance of your site. While this is not required, it’s strongly recommended that you follow this step as it may required depending on the software features you’re going to use.
Navigate to “system – configuration” and select “automation” tab. Fill in random alpha-numeric characters into the “security string” text box (30 characters or less is fine). Make sure to use only letters and/or numbers and no other characters. This ensures that no one else can run automation tasks for you. Once done click on “submit” to save it.
Navigate back to the same page and copy the contents of “cron job command” text box. You will now need to create a cron job to run this command on your server at least “once per day”. Cron is a software utility that allows tasks to keep running automatically in the background at predefined time intervals. This can normally be done in your hosting control panel. If you’re not sure how to do this, contact your hosting provider for assistance.
Copyright notice
If you purchased the “copyright removal” addon, navigate to “system – configuration” and click on “look and feel” tab. You will be able to remove or change default copyright notice displayed at the bottom of public pages.
Update privacy policy and terms of service
Every website must have a privacy policy available for its users as it’s required by law in most countries. It’s also a good idea to have terms of service to avoid any legal complications. You can update both in the control panel by going to “content => pages”. Once there click on “sub-pages” next to “legal pages” and you’ll see your privacy policy and terms of service pages. If you’re not sure how to create these policies, you may use custom tailored legal policies generation service. It will create them specifically for you and how you operate your website.
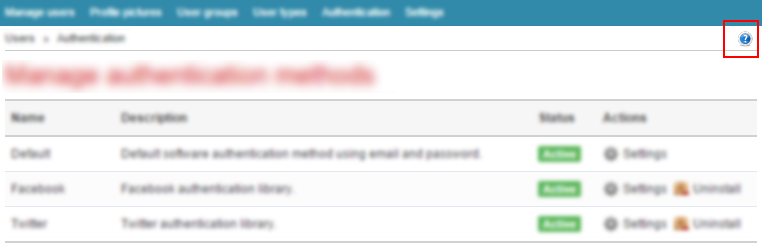
Quick help
If you run into questions about certain settings or functionality on any of the pages in the control panel, simply click on the “Help” icon in the top right corner of the page. It will take you directly to our online documentation that explains the page in question.
Final words
Steps listed above are sufficient to start running your site without any additional configuration. However, we strongly suggest you go through all available pages in the control panel guide to familiarize yourself with the rest of the system as it will answer most, if not all, of your questions you may run into.
Importing data from vldPersonals
Before you begin
For the import wizard to be able to transfer your data from vldPersonals it needs to be accessible by DatingScript. As such it’s best to install DatingScript in a sub-folder where vldPersonals is currently located. For example if you have vldPersonals installed at mysite.com, you may install DatingScript at mysite.com/new Once you’re done copying your data, you can delete vldPersonals files and move DatingScript to mysite.com
Install DatingScript
First step you need to take is install DatingScript. Simply follow our Installation Instructions and install it in a sub-folder of your current site, for example mysite.com/new
Install import wizard
Download vldPersonals Import Wizard from the client area, extract the files on your computer and then upload them to your site. Make sure to upload them into the same folder where DatingScript is installed.
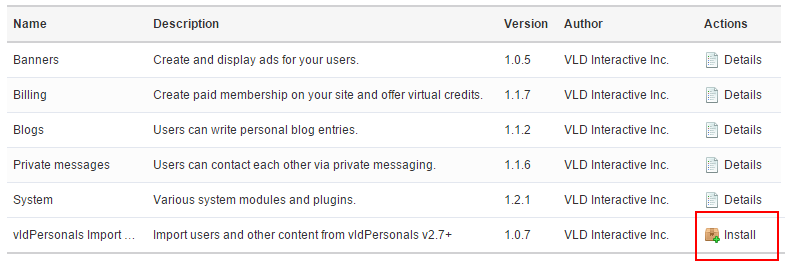
Install the plugin
In the DatingScript control panel navigate to “system – plugins” and click on “install” link next to vldPersonals Import Wizard plugin.
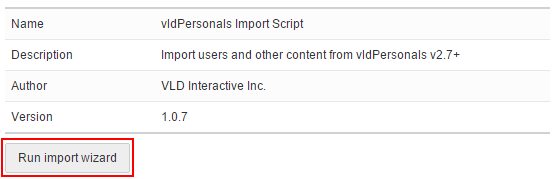
Run the import wizard
To run the import wizard click on the vldPersonals Import plugin name (or on the “details” link next to it) and then click on “Run import wizard” button.
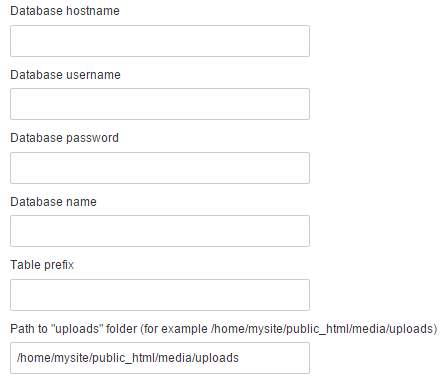
You will be asked to type in your vldPersonals database details. If you don’t know what they are, you may look them up in the “includes/config.php” file in the folder where vldPersonals is installed. You must also include a full path to the “uploads” folder where vldPersonals stores users images and other user uploaded files. For example if vldPersonals is installed at “/home/mysite/public_html” folder, then uploads folder path will be “/home/mysite/public_html/media/uploads”. If you don’t include correct folder, system won’t be able to copy users’ pictures. You may contact us if you need assistance with any of this.
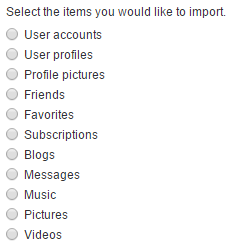
On the next step you will be asked to select the items you would like to import. You must start off by importing user accounts. Once done, you will be able to go back to this step and import other items. Note that if you try to import items other than “user accounts” or “user profiles” more than once, you will end up having duplicate data!
When importing users, note that user group names in vldPersonals must match those in DatingScript. Otherwise they will not be copied (for example canceled users will become active again). Same goes for upgraded membership packages. Make sure that the names of membership packages in vldPersonals match those in DatingScript.
Update profile questions
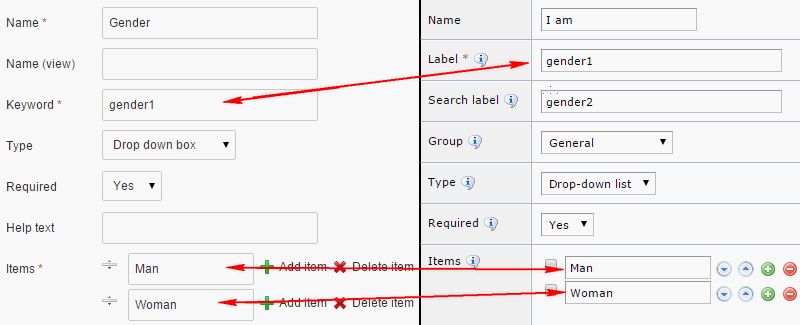
Make sure your profile field “labels” in vldPersonals match the values of “keywords” in DatingScript profile fields. Below is an example of the “Gender” (or “I am” in vldPersonals) profile field. On the left is DatingScript and on the right is vldPersonals. Note that “keyword” in DatingScript matches “label” in vldPersonals, and “items” in DatingScript match “items” in vldPersonals (order doesn’t matter). If any of those don’t match, import wizard will not be able to copy the profile field.
If users or profiles do not import as desired (for example not all profile fields were copied), you may make necessary adjustments and run import process for users and/or profiles again. You may do so as many times as you wish – it will not cause duplicate data. Do not however import other items more than once (such as blogs, pictures, videos, etc) as it will cause duplicate data.
Replace vldPersonals with DatingScript
When you finish migrating data and are happy with the results it’s time to replace your live vldPersonals site with DatingScript. To do that you may follow the steps below.
Click on “reissue license” in the client area on your license page. This will ensure that your site details are updated in your license when you move software files to a new location.
Update “application/config.php” file in DatingScript to reflect new location. In our example above we installed DatingScript at mysite.com/new so you will need to change it to mysite.com
Update “local” storage settings in the control panel under “system – configuration – storages” and make sure path to the “uploads” folder is correct. For example if you currently have something like this:
/home/domains/mysite.com/public_html/new/uploadsYou will need to remove the “new” folder from there so it looks like this:
/home/domains/mysite.com/public_html/uploadsThis is just an example so make sure that you use your own folder paths in there.
And finally you need to remove vldPersonals files, move DatingScript files to mysite.com and delete all files in the “application/cache” folder.
Once done browse through your site to make sure it works correctly. Also login and try uploading a picture to make sure uploads folder path is correct and works as it should.