Designer guide
Templates
Development mode
Before you start customizing templates, make sure to enable “development mode” setting in the control panel under “system – settings”. This will ensure that system does not use cached data so your changes are seen right away. Also edit “index.php” file and set “ENVIRONMENT” constant to “development”. This will ensure that system displays errors if any occur so you could easily spot and fix any issues you may come across. Do not leave development mode enabled on a live site as it will slow it down considerably.
Directory structure
Templates have the following directory structure:
application/views
Software template files.
templates
Your own template files. Each template has its own folder, for example “templates/your_template”.
Cascading file system
File system in the software is a hierarchy of similar directory structures that cascade in the following order:
- Your template files – files located in the “templates/your_template” directory.
- Software template files – files located in the “application/views” directory.
Whenever any page is displayed, system first looks for the related template file in the “templates/your_template” directory and if it’s not found it looks for it in the “application/views” directory. This makes it possible to overload any application template file by placing a file with the same name and directory structure in the “templates/your_template” directory. Whenever new updates come out, you won’t have to figure out what files were modified in the “application/views” folder since you have them in your own template’s folder instead.
Wrapper files
Each template is comprised of just a few files. These files are so called “wrappers” for pages displayed on your site. By editing these wrapper files, you may create completely different look and feel of your site.
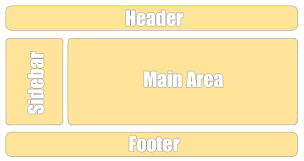
Required files
Your template must have the following files which are required by the system.
header.php
This file is used to display the header of your site. This will typically include the logo and navigation bars. Sidebar content will also normally be here.
footer.php
This file is used to display the footer of your site. This will typically include some copyright notices, and perhaps some quick links to some pages on your site.
home.php
This file is used to display the home page of your site.
manifest.php
This file stores your template name and optional settings that will show up in the control panel if present.
Customizing specific pages
You may customize any page of the site, not just its header and footer. To do that, simply copy a file you want to modify from “application/views” folder to your own template’s folder. For example if you would like to customize user’s profile page, you may copy “application/views/users/view.php” file to “templates/your_template/users/view.php”.
Template configuration
You may specify different configuration parameters for your template in the “manifest.php” file. These will be displayed in the control panel on template settings page. It’s quick and easy way to offer various settings that can be used with your template to display different content, colors, etc. Here’s an example of “manifest.php” file:
$params = array(
	// Template name
	'name' => 'Breezy',
	// Template settings
	'settings' => array(
		// General section
		array(
			'name' => 'General',
			// Settings for the General section
			'settings' => array(
				array(
					'name' => 'Site logo image (300x70px)',
					'keyword' => 'site_logo',
					'type' => 'image',
					'resize' => array(
						'dimensions' => '300x70',
						'method' => 'preserve',
					),
				),
				array(
					'name' => 'Hide site title',
					'keyword' => 'site_title_hide',
					'type' => 'boolean',
					'value' => 0,
				),
				array(
					'name' => 'Title left padding',
					'keyword' => 'site_title_padding',
					'type' => 'number',
					'value' => '60',
				),
			),
		),
		// Homepage section
		array(
			'name' => 'Homepage',
			'settings' => array(
				array(
					'name' => 'Homepage image',
					'keyword' => 'home_image',
					'type' => 'image',
					'resize' => array(
						'dimensions' => '350x230',
						'min_dimensions' => '350x230',
						'method' => 'stretch',
					),
				),
				array(
					'name' => 'Welcome title',
					'keyword' => 'home_welcome_title',
					'type' => 'text',
					'value' => 'Welcome to our community',
					'multilang' => true,
				),
				array(
					'name' => 'Welcome text',
					'keyword' => 'home_welcome_text',
					'type' => 'textarea',
					'class' => 'input-wide input-small-y',
					'value' => '',
					'multilang' => true,
				),
			),
		),
		// Social links section
		array(
			'name' => 'Social links',
			'settings' => array(
				array(
					'name' => 'Facebook username',
					'keyword' => 'social_facebook',
					'type' => 'text',
					'class' => 'input-xlarge',
					'value' => '',
				),
			),
		),
	),
);
Settings are combined into sections. You may have as many sections and as many settings in each section as you like. Each setting can be of different type such as text box, text area, drop down list, image, etc.
You may access these settings your template files like this:
<?=config::item('home_welcome_title', 'template')?> // display 'home_welcome_title' setting value
<?=config::item('home_welcome_text', 'template')?> // display 'home_welcome_text' setting value
<?=config::item('social_facebook', 'template')?> // display 'social_facebook' setting value
<?=config::item('site_logo', 'template', 'file')?> // display 'site_logo' image file, note the 'file' at the end in this setting
Including template files
Your may include template files withing other template files for better organization to reuse code. For example in your “home.php” file (default home page file) you will see the following code at the top:
<? view::load('header'); ?>It includes the contents of your “header.php” file. Since header code will be the same across all pages, it makes sense to store it in its own file and include it rather than insert the same long code in each file. Same goes for footer. Notice that when including a file, we don’t use “.php” extension in the file name.
Passing variables to template files
You may pass variables to template file you include. For example:
<? view::load('header', array('title' => 'My custom title')); ?>By using this code in “home.php” file, we can now use $title variable in the “header.php” file, for example:
<?=$title?>When system displays any page, it passes certain variables to the related template file by default to display content. For example when displaying user’s profile, it passes $user variable which stores user information.
Classes and helpers
You may access system classes and helpers in template files to display various data. For example:
<?=config::item('site_title', 'system')?> // display site's title
<?=session::item('username')?> // display user's username
<? if ( users_helper::isLoggedin() ): ?> // checks if user is logged in
  // logged in
<? endif; ?>
You may view all available values in config and session classes by using this code:
<? config::toString(); ?> // show config class values
<? session::toString(); ?> // show session class values
Helpers contain code that can be used to display certain data on any page. For example you may display picture albums on the homepage by using this code in “home.php” file:
<? loader::helper('pictures/pictures'); ?>
<?=pictures_helper::getAlbums(array('join_columns' => array("`a`.`picture_id`!=0", "`a`.`total_pictures`>0"), 'limit' => 10));?>
Note that we first load helper file and then use its function to display picture albums. You may find available helper files in the “application/helpers” folder.
Style sheets
Development mode
Before you start customizing style sheet files, make sure to enable “development mode” setting in the control panel under “system – settings”. This will ensure that system does not use cached data so your changes are seen right away. Also edit “index.php” file and set “ENVIRONMENT” constant to “development”. This will ensure that system displays errors if any occur so you could easily spot and fix any issues you may come across. Do not leave development mode enabled on a live site as it will slow it down considerably.
Directory structure
Style sheet file are located in two places and have the following directory structure:
1. assets/css/system/core
Core style sheet files that are loaded in every template (such grid, buttons, typography, etc).
2. assets/css/*plugin*
Plugin style sheet files (such as blogs, pictures, etc).
3. templates/your_template/css
Your template’s style sheet files (such as template’s layout, content, etc).
When system uses your template, it loads all style sheet files from your template’s folder and all style sheet files from the assets folder if related plugins are installed. All style sheets are combined and compiled into one which reduces the file size and increases loading speed and overall performance.
Required files
Your template must contain “style.less” file in its “css” folder, for example “templates/your_template/css/style.less”. This file has to include necessary code to load the core CSS files (#1 above), plugin CSS files (#2 above) and your own template’s CSS files (#3 above). Simply refer to an existing style.less file in one of our default templates to see how it works.
Using Less
All default style sheet files are coded in Less. Less is a CSS pre-processor, meaning that it extends the CSS language, adding features that allow variables, mixins, functions and many other techniques that allow you to make CSS that is more maintainable, themable and extendable. All existing CSS functionality works the same way in less files, except that you can also use new features provided by Less. You may learn about its syntax at lessphp compiler page which the software uses to compile Less files.
Loading style sheet files
Default “style.less” file has code similar to this:
// Core
@import url("[base_path]assets/css/system/core/style.less");
// Variables(? indicates that the file is optional and won't trigger an error if it doesn't exist)
@import url("vars.app.less");
@import url("vars.custom.less?");
// Externals
@import url("externals/*");
// Plugins
@import url("[plugins]");
// Template
@import url("layout.less");
@import url("content.less");
@import url("homepage.less");
@import url("social.less");
// Custom styling (? indicates that the file is optional and won't trigger an error if it doesn't exist)
@import url("custom.less?");
Actual code is separated across multiple files instead of having one file with thousands of lines of code making it difficult to navigate and work with.
Note that your default “style.less” file must have this code present:
@import url("[plugins]");It tells the system to load style sheet files from the “assets/css/*plugin*” folders for the plugins installed on your site.
You may load files that may or may not exist, for example:
@import url("custom.less?"); // note the question mark at the endSystem will load “custom.less” file if it exists in the “templates/your_template/css” folder. If it doesn’t exist it won’t be loaded and no error will be displayed.
Default files
Default templates come with a variety of style sheet files that contain code for alerts, form, buttons, layout and other content on your site. They also contain the following files that store generic information such as colors, font sizes, etc which allow you to easily modify the look of your site without looking for the code all across the files:
vars.system.less
This file contains default generic settings for the entire software. This file is the same in all default templates.
vars.app.less
This file contains settings that override generic settings in the file above and apply specifically to your template.
Customizing default style sheets
Default templates come with two style sheet files called “_custom.less” and “_vars.custom.less”. If you would like to customize any of the default style sheets, you may rename these files to “custom.less” (for style sheet code) and “vars.custom.less” (for style sheet settings) respectively and insert your code there. Code in these files will override code in all other style sheet files of your template. This way if you customize one of the default templates, you won’t have to redo your customizations when new updates come out since your custom code will be stored in those 2 files.
Customizing plugin style sheets
If you would like to change or add styling to any of the plugins, you may do so by creating a new file called “style.less” and placing it in the “templates/your_template/plugins/plugin_name” folder. For example “templates/your_template/plugins/users/style.less”. Note that file name must be “style.less” as system will look for it first. If you would like to add other files for the plugin, you certainly can do so by loading them from the “style.less”.
Javascript
Development mode
Before you start customizing javascript files, make sure to enable “development mode” setting in the control panel under “system – settings”. This will ensure that system does not use cached data so your changes are seen right away. Also edit “index.php” file and set “ENVIRONMENT” constant to “development”. This will ensure that system displays errors if any occur so you could easily spot and fix any issues you may come across. Do not leave development mode enabled on a live site as it will slow it down considerably.
Default files
Default javascript files are located in the “assets/js” folder. System first looks for and loads “assets/js/system/scripts.js” file, which in turn loads a variety of other different javascript files including those for plugins. All default javascript files are then combined and compiled into one which reduces the file size and increases loading speed and overall performance.
Among the default javascript libraries that system loads are:
You may take advantage of these libraries by using them in your templates without having to load or include those files.
Loading javascript files
Software uses HeadJS to help you load .js files without affecting performance. You may use the following code anywhere in your template to load your javascript file:
<script type="text/javascript">
head.load("<?=config::basePathURL('templates/'.session::item('template').'/js/myfile.js')?>");
</script>
It will translate into something like this:
<script type="text/javascript">
head.load("/templates/your_template/js/myfile.js");
</script>